Chocolate dome

Cakes

chocolate dome01297

I reached that point in my life where I am OK with spending my money on kitchen supplies rather than on clothes or shoes, which is weird, because everyone who knows me knows that I am (or was…) a complete shopaholic. But ever since I laid my eyes on this dome mold a year ago I wanted it to be a part of my collection of… 3 trays and 2 cooking rings (I’m working on it, ok?!). So one day I entered The Kitchen Shop, went straight to the trays section and held it close to me while I was browsing for other stuff. By the end of the shopping spree I found myself going to the cashier and paying some hard earned money for this 6 dome silicone mold. What can I say, I got hooked up on the idea of making all kinds of chocolate or fruits entremets covered in mirror glaze, with biscuit or brownie base, decorated with caramel, ganache or fruits; the options were unlimited!

chocolate domes

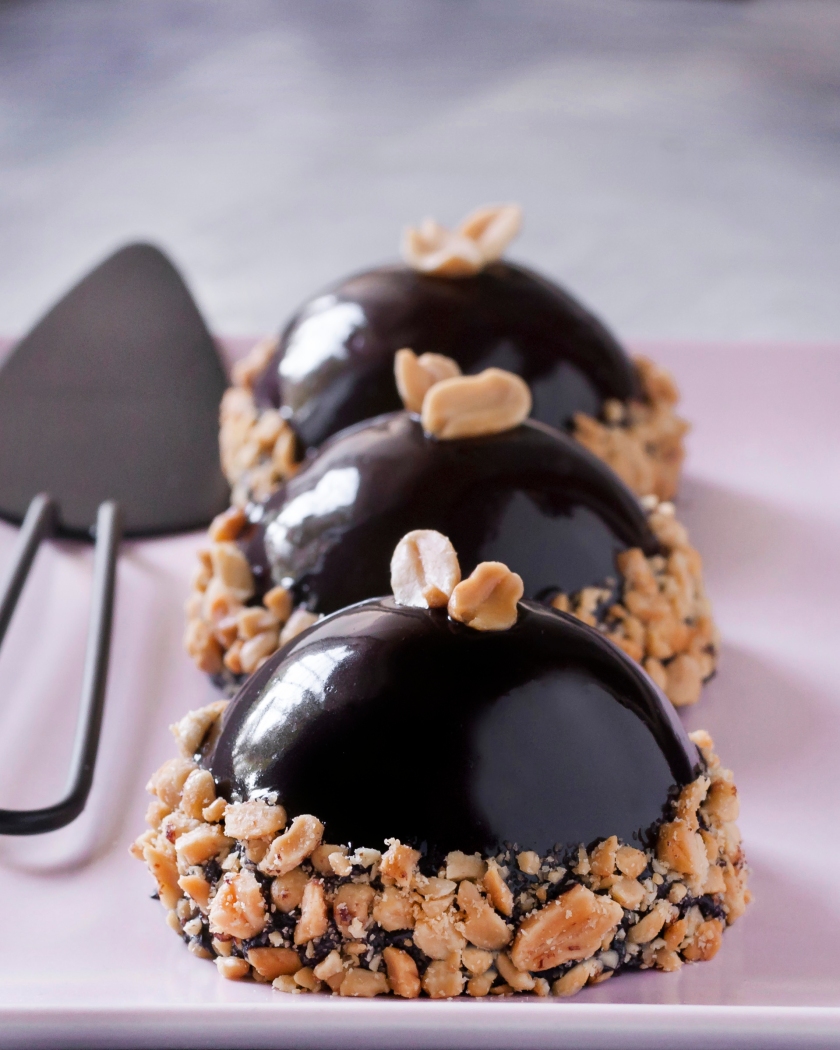
After a few tries I finally got right the chocolate dome; the first time I waited too long for the chocolate mirror glaze to cool and it was hard to spread around; taste wise, it was a sweet dream covered in chocolate and with an Oreo heart. The second time I used less whipped cream and I certainly incorporate better the chocolate ganache in it because it turned into a rich brown mousse. Also, I wasn’t left with a ton of cream to spare (it actually is the right amount yay). I didn’t use the Oreo heart anymore because the last time my dad scattered it all over the kitchen; guess it was to hard compared to the soft mousse.

I made these a couple of times and I have to admit, every time I do it better than the last. That is encouraging, because I hope that people are not bored yet by my countless trials and they still enjoy the dessert. The soft mousse is a perfect match to the brownie base, while the chocolate glaze covers everything in a silky smooth layer; to add some contrast to all this sweetness, I paired the dome with a crushed peanuts belt. At some point, I swapped this for a crushed pistachio base, and it was great too.

chocolate dome01298

This is one of the desserts I will never stop making, for 3 reasons:

  1. unlimited choices of ingredients
  2. tastes heavenly
  3. looks like a high-end dessert made by a french pastry chef

Bonus reason: I absolutely love sweet stuff. And I have a feeling that everyone who reads this has, so … make. the. dome.

chocolate dome

dom de cioco

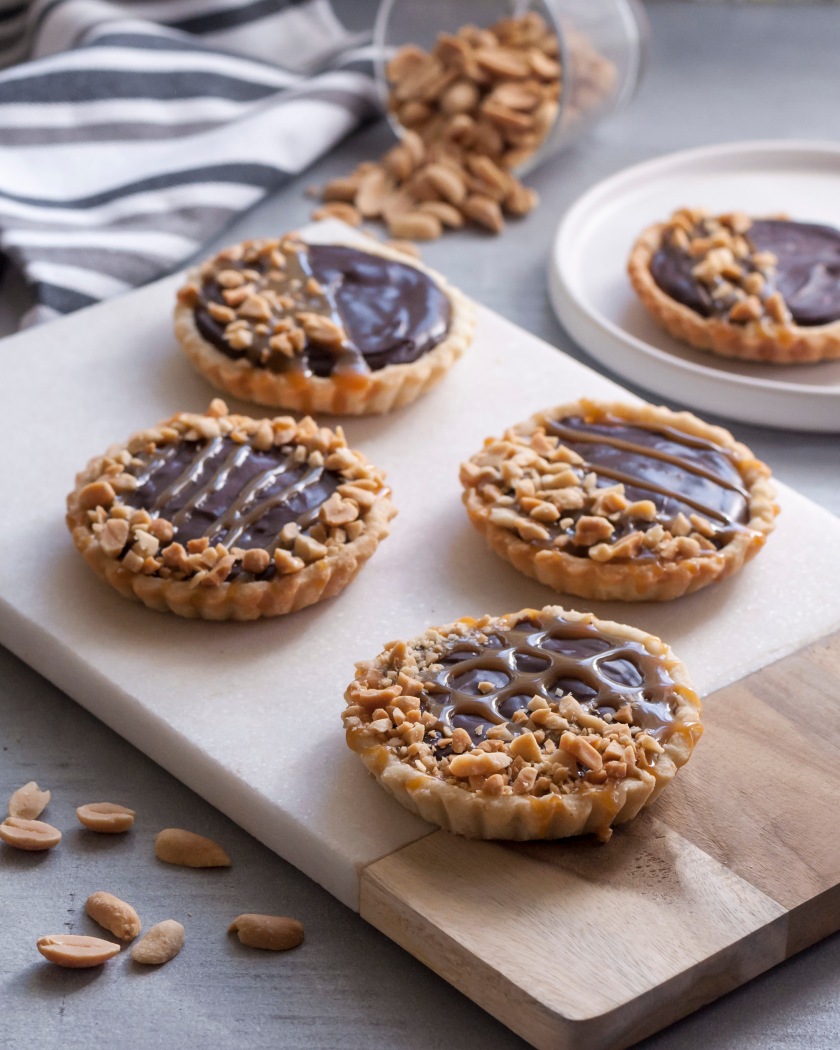
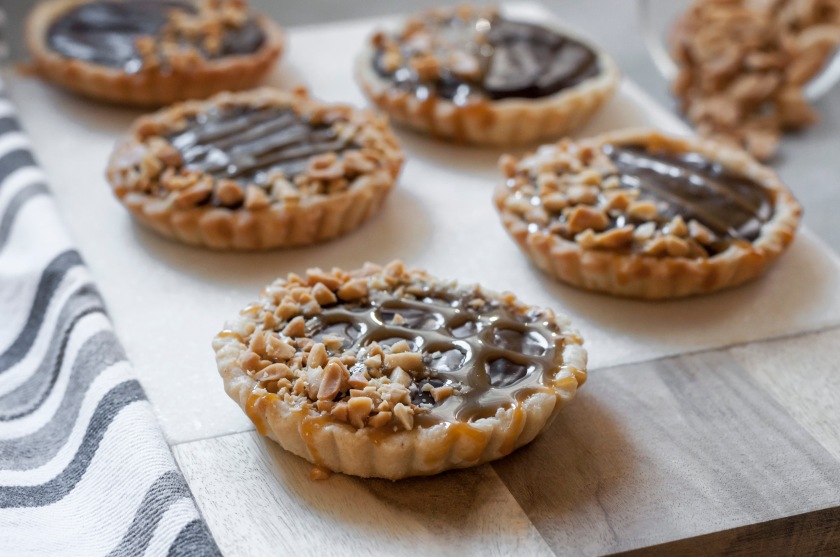
Chocolate and caramel tarts

Pies

I can’t really wrap my mind around the fact that college started… again. With all the changes happening in my life -like waking up early in the morning, making my own food and staying way to much at school- I really wanted to lift my spirit up; and what better way to do that than baking something with lots of chocolate in it? These tarts are the perfect excuse to indulge something sweet and savory at the same time, without compromising your happiness.

01

For the first time ever I betrayed my tart crust recipe and I went for the store bought one. Although it saved me some time, I am not that impressed by it; it tastes ok, I can’t complain, but for tartlets it’s not that efficient. You can’t reuse the leftovers that remain after cutting your small shapes, and I learned that the hard way. After rolling the dough again, it puffs up in the oven like crazy (time to switch to pizza bites haha). I still managed to ace 9 little cute tartlets shells tho!

04

The secret key to these lovely tarts is the layering factor. First you have the pie crust, which brings it all together, then you have the caramel sauce, the crunchy peanuts layer, the chocolate ganache and the caramel drizzle. And again some decorative peanuts. Boy that was a lot. Disclaimer: I don’t really care about calories (although I should), so I don’t mind the… boost in my daily intake, but if you are all about that stuff, you probably… should bake the tarts and change your mind. Tee-hee.

05

On another note… I really hope that I’m improving the food photography and editing technique, especially since I watched bromabakery’s tips for succeeding in this domain. In my opinion, the hardest thing to do is to find yourself and to find that something that makes you unique and different from all the other accounts that have the same theme. I am still working on that aspect… and most likely I will struggle with it for another period of time; but trying your best is what you should do, right?

07

The motto for today: sweet and savory, all in a shell- what else do you need?

Chocolate cupcakes

Muffins

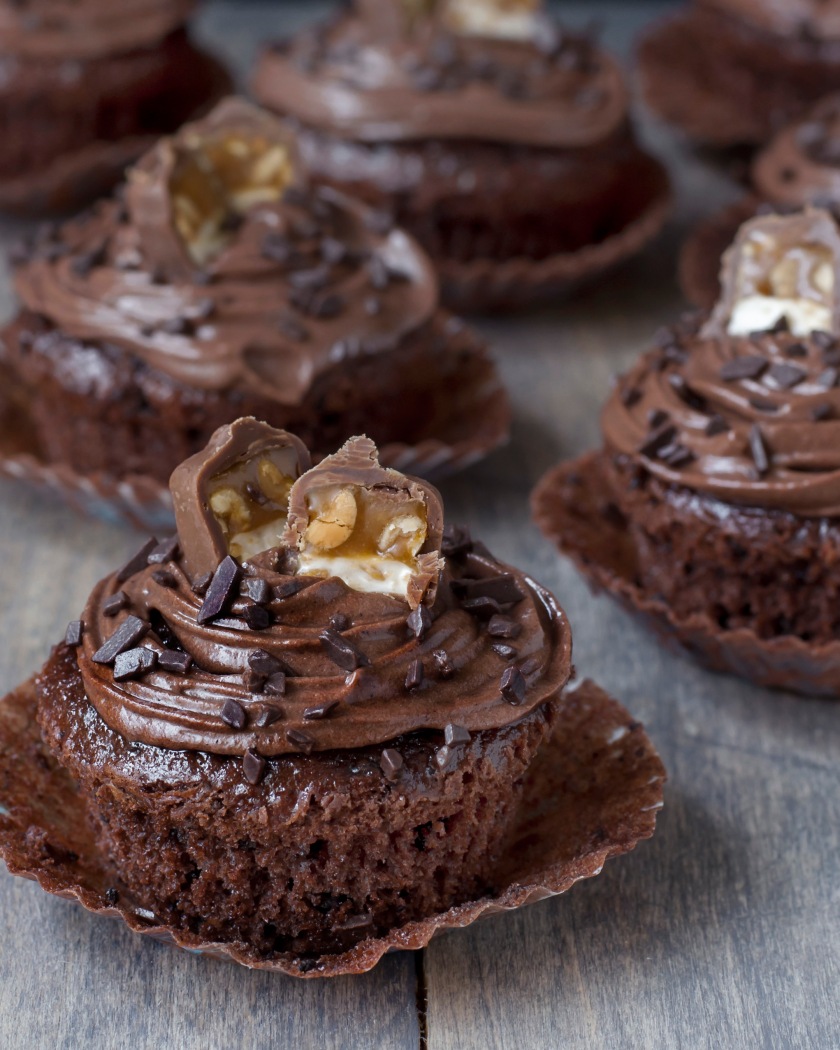
I really really really wanted to bake something with chocolate. Chocolate batter, chocolate chips, chocolate frosting, chocolate on top of chocolate! I might have a little addiction to this ingredient… When it comes to chocolate, more is more and less is a bore, so let’s apply that in the kitchen and start baking some choco-licious cupcakes!

0101.jpg

Funny story about these little ones: I blind baked them!! I know, it sounds like one of those click-bait titles on Youtube, but it’s more accurate than you’d think. It was a huge storm outside the night I was making cupcakes, and soon after placing them in the oven, the lights went off. And the oven timer. Aaand the oven light. I didn’t even know how much time has passed already! I quickly turned on the timer on my phone, estimating  a baking time, hoping not to burn everything (including the house). Everything was baked then with the help of my brother who held his phone flashlight while I was checking on the cupcakes, making another batch and washing dishes. Needless to say, the lights went on when I finished with everything… and the cupcakes were out, cooling on a rack! I guess I got lucky, cause they turned out just fine, so I need to stop complaining.

03

The first one I ate was “a failed one”, how I like to call it. I was just struggling a little bit more with it while trying to get it out of the pan and it came out with a missing piece. That’s a good enough reason to eat it right away, even though it was still hot and it burned my mouth. What can I say, I am a greedy person when it comes to sweets. Not to mention that I love to eat the leftover batter on the spatulas every time…

05

cupcakes

briose

Caramel and pear cake

Cakes

Hello, fall! I don’t know if I’m excited about this or not, because suddenly I can feel the responsibilities coming back in my poor student life, but I will try to embrace the fabulous beginning of a fabulous new season. Too much? OK, I’ll take it down a notch. In my desperate efforts to accept that summer is over, I was willing to sacrifice myself to a cake that has been present in my mind since… well, since I’ve discovered it on Instagram (because that’s my principal source of inspiration along with Pinterest- God bless them both). This amazing company in Moscow called @tortikannuchka  makes the most stunning cakes I’ve ever seen in my life, but one of them got my attention in an unhealthy way: a wonderful cake covered in dried and colored pear slices. I was madly in love with it, so I decided to try and recreate it in my own peasant, non-extremely-talented-chef way. Fast forward to the first days of September – I was blessed with a bag of pears that would represent the first step in the making of a pear cake.

I have to admit that I thought so intense about the exterior of this cake that I had no idea what it was going to be inside it until the big day. I knew that I wanted chocolate, but what tastes would go in harmony together? Not to mention that it had to be in sync with the pear exterior, cause what’s the use of covering your cake in pears if inside it’s going to be, for example, a strawberry cream. So, to recap: chocolate layers, a pear cream (had no idea how to do it) and… caramel, of course. But I never did anything with caramel before (the bought caramel sauce doesn’t count)! There were many unknown factors in this baking operation.

PS: I am proud to say that the black cardboard that served as a background will be retired; I finally managed to paint two wood boards! In my excitement I tried to play a little with the light and some pears. AND with one of the backgrounds.

First things first, I cut some pear slices with a professional slicer machine; it works just as well if you cut them carefully by hand in thin slices. Then I bathe them in sugar syrup colored with blackberries, blueberries and strawberries, and another round with food dye. I have to say that the natural dye from the forest fruits worked waaay better than the bottled one, so if you can, choose the first option of coloring. Place the slices in the oven and wait for them to dry, about an hour, then store them in the pantry, not in the fridge.

I baked the chocolate cake, it was cool. Then I got to the cream filling part. How does one melt sugar and transforms it into caramel syrup?? Luckily my mom was there to the rescue and she showed me how to get that amber colored sweet caramel. OK, I figured that part out. But how about the pears? There was no pear cream online so I can get some inspiration, but I already started to chop them in small dices. And poach them. In my mind it would turn into a thick cream like composition, but it wasn’t; it looked like a runny jam stuff. So I added some gelatin, but not enough to make it a stiff gelatin sheet, just the right amount to thicken it a little bit. Yay! I was finally on the assembly part of the cake.

01

One cake, syrup, caramel cream, one cake, syrup, caramel cream on the sides so the pears won’t drip out, pears on the inside, one cake, syrup, caramel cream, more caramel cream. I measured the diameter of the cake and start arranging the pear slices on the counter top in a pattern so I won’t freak out if I have a weird combination of colors left. Then I simply started to add them to the cake, slice by slice, until it was all covered (or that’s what I hoped I did). My cake was finished!!! I still don’t know how the master bakers keep their pear slices from curling, but I won’t give up and still try to ace this technique!

caramel cake

tort caramel

Blackberry cheesecake

Cheesecakes

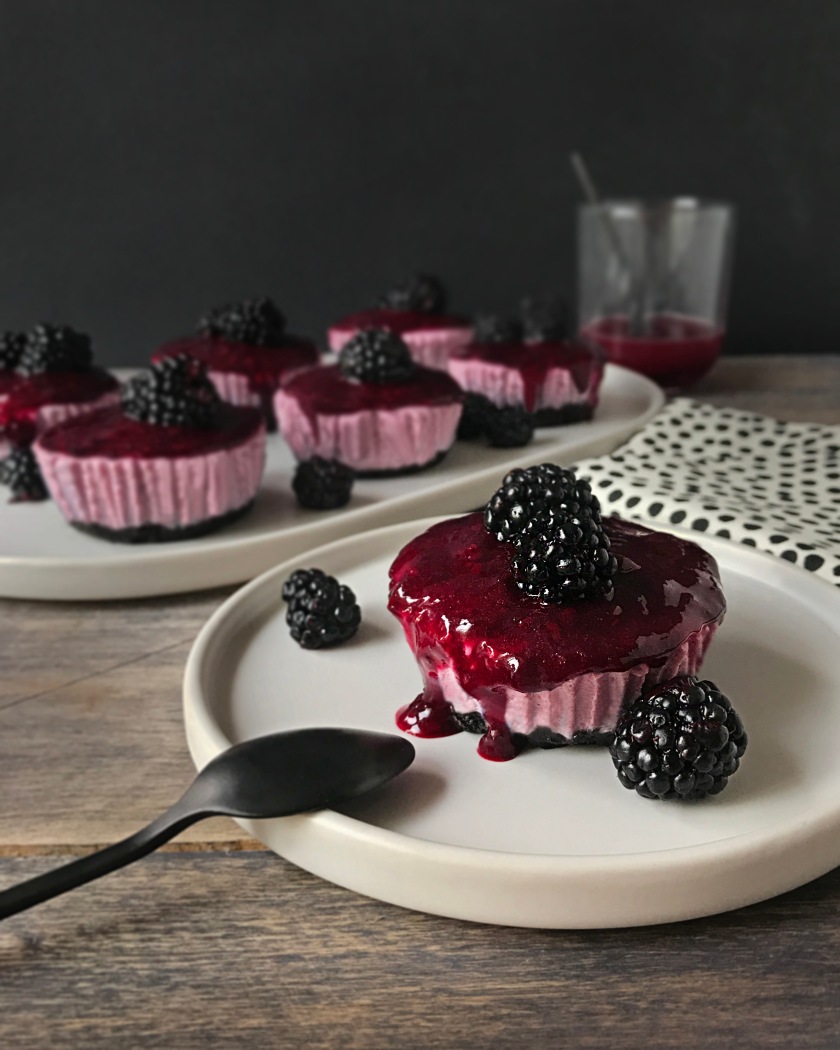
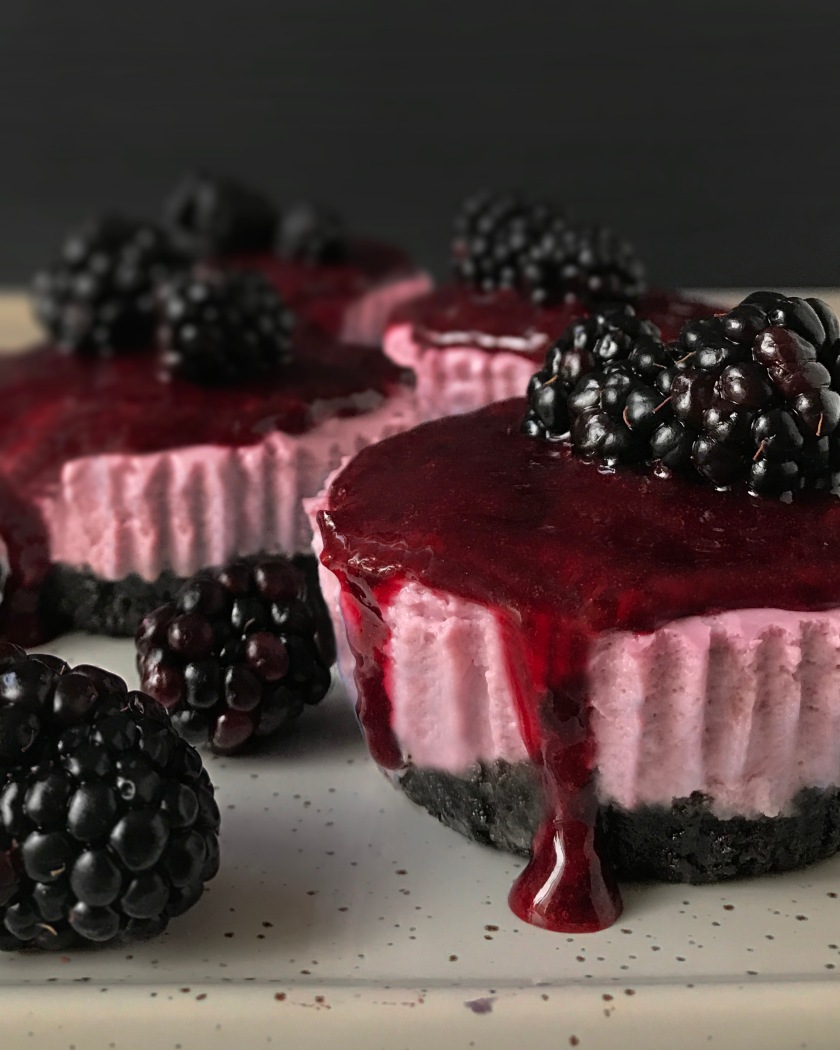
Another day of summer, another sweet thing in my tummy; this time it’s a pink cheesecake with an Oreo base and lots of blackberries, because dessert is my “5 pieces of fruit/ day”. Actually, this one has forest fruits in it, so it counts, right?!

IMG_5260

I think cheesecake is one of my favorite desserts because it brings together the best of all worlds: crunchy chocolate-y base, fruity soft cheese cream that reminds me of the yogurt I was eating when I was little (Danonino, anyone?), syrup or jelly and of course, fresh pieces of fruit that balance out all the sweetness in the dessert. I choose to ignore the fact that it probably has a lot of calories and fats because I just can’t get on board with all the raw vegan no sugar no fun type of dessert that is trending now, sorry. I live by the principle “mo’butter, mo’ better” (Honey BooBoo reference).

IMG_5233-Recovered

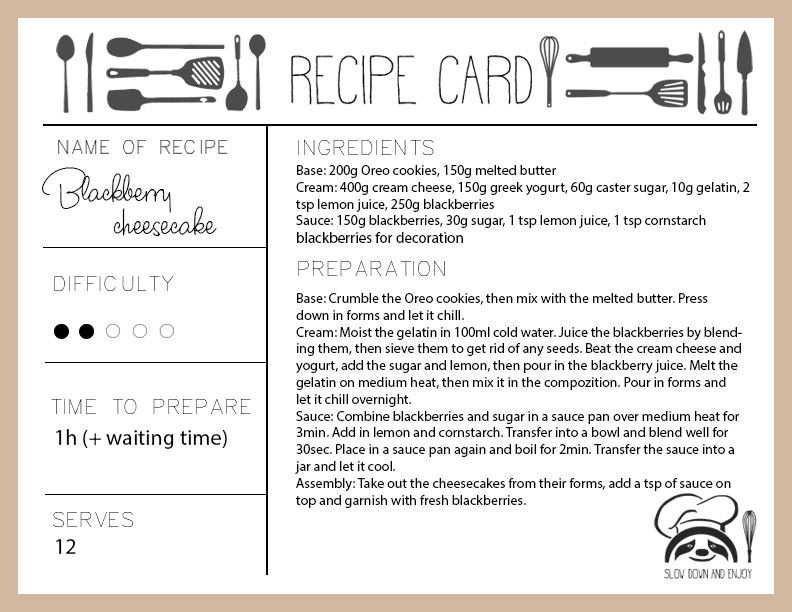
Let’s talk a bit about this recipe; you’ll get 12 mini-cheesecakes if you place them in a regular muffin pan, or you can get a normal sized cheesecake if you prefer it that way. In my opinion, the smaller ones are easier to serve and everyone gets an equal part of the dessert, so you won’t hear the “my slice is smaller!” song.

You can use as many blackberries as you want- as you may see, I went nuts with them; the only thing that escaped the forest fruits frenzy was the cookie base, that is only made with Oreo and melted butter. The most time-consuming activity is sieving the blackberry juice (or at least, that was for me because I have one small strainer), but in the end it is worth it.

IMG_5229

IMG_5283

Final tips and tricks:

1. Don’t even think about melting less butter, unless you want a crumbly mess to happen.

2. Although it takes some time, it is better to sieve the blackberry juice that goes into the cream in order to get a softer cheese mixture.

3. You can keep the cheesecakes in the freezer for a shorter time, if you don’t want to wait all night for them to chill.

4. If you want your sauce to be thinner, add one-two spoons of water before boiling it for the second time.

5. Slow down and enjoy!

blackberry

mure

Twix brownies

Cakes

I cannot express how glad I am that I finally can post this recipe. It’s been in my food folder since January, when I first made it, but sadly I lost the photos – and I kept hoping I will find them somewhere hidden, cause what is a *food blog* without the *food photography *part? I don’t know if the new pics are better than the lost ones, but the brownies definitely were; practice is the key of success, right?

69

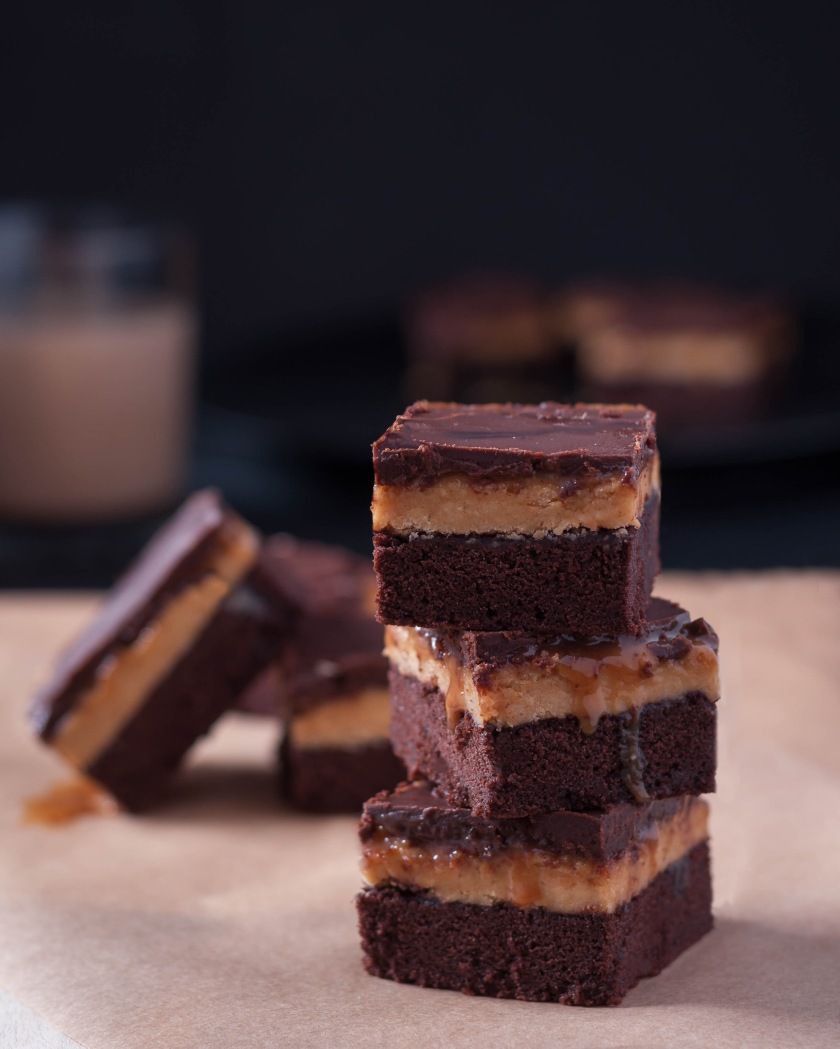
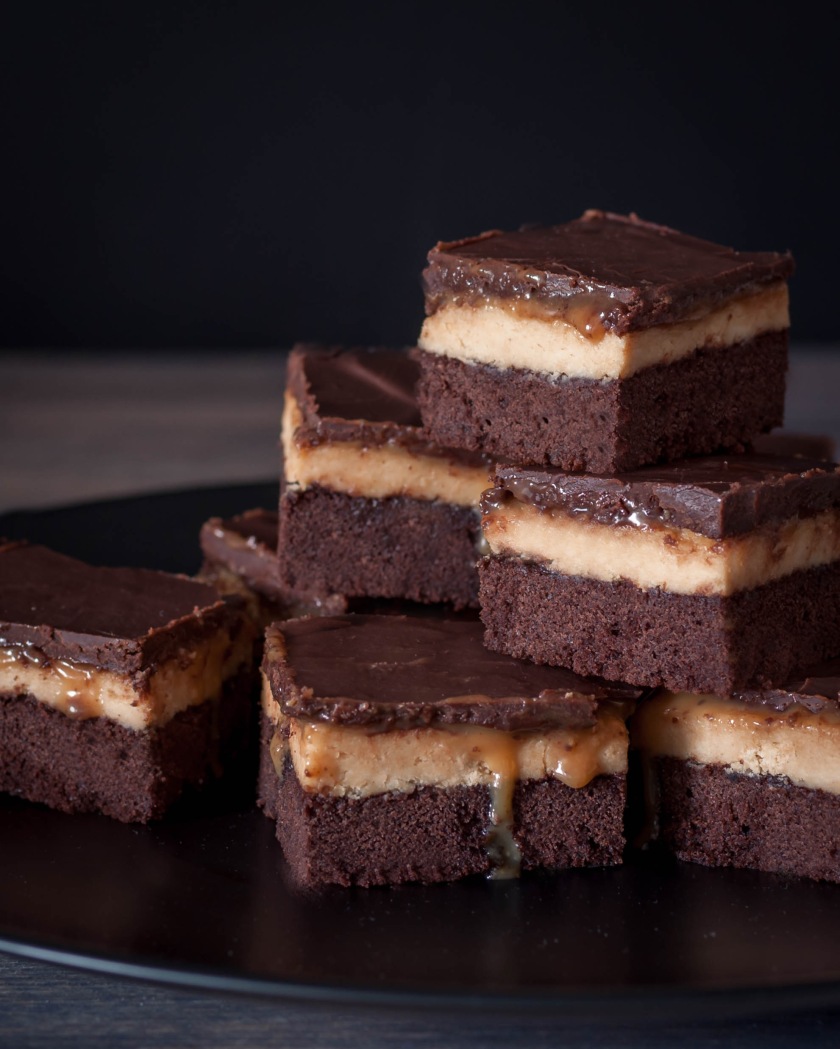
Let me introduce you to my party people (Pitbull and JLo reference, anyone?) these Twix brownies made out of  4 layers of sweet heaven: brownie base, cookie cream, caramel syrup, chocolate glaze.

22

First you got to make that basic brownie, wait for it to cool and start smashing some biscuits; you have to mix them really well with the cream cheese, otherwise it won’t stick to the previous layer. If it’s too stiff, try to soften it with a tbsp of milk. Add the caramel filling, keep in the fridge for half an hour, then prepare the chocolate glaze and pour it all over the cake (and wait for it to cool down- again).

100

Next step is… enjoy. Cut it in pieces and share it or eat the whole thing by yourself, if that’s how you roll. I won’t judge.

brownies

twix

Chocolate and caramel tartlets

Pies

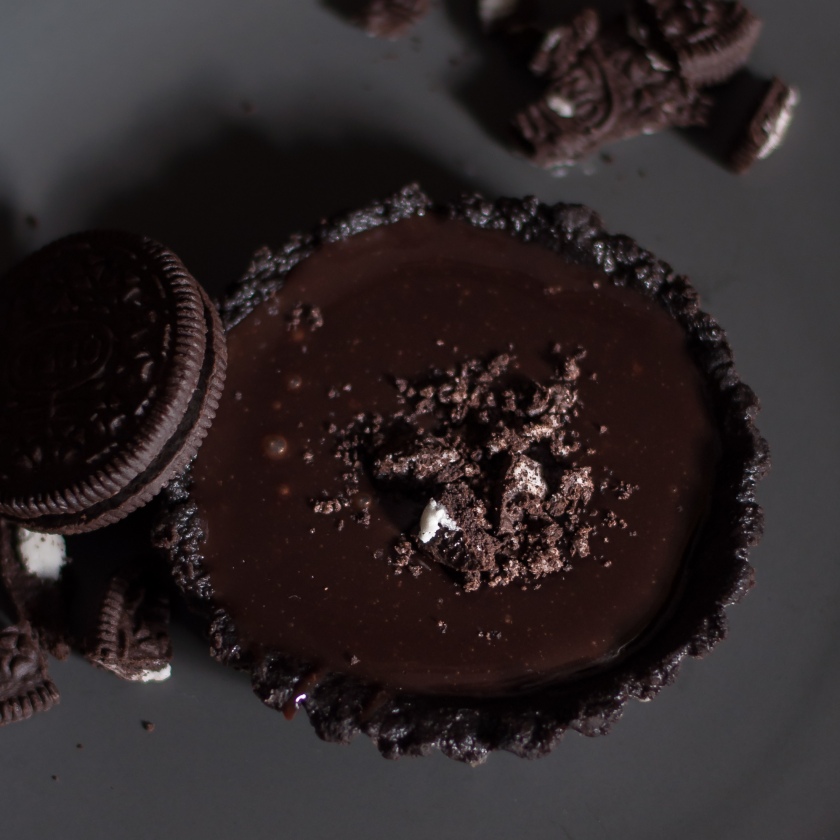
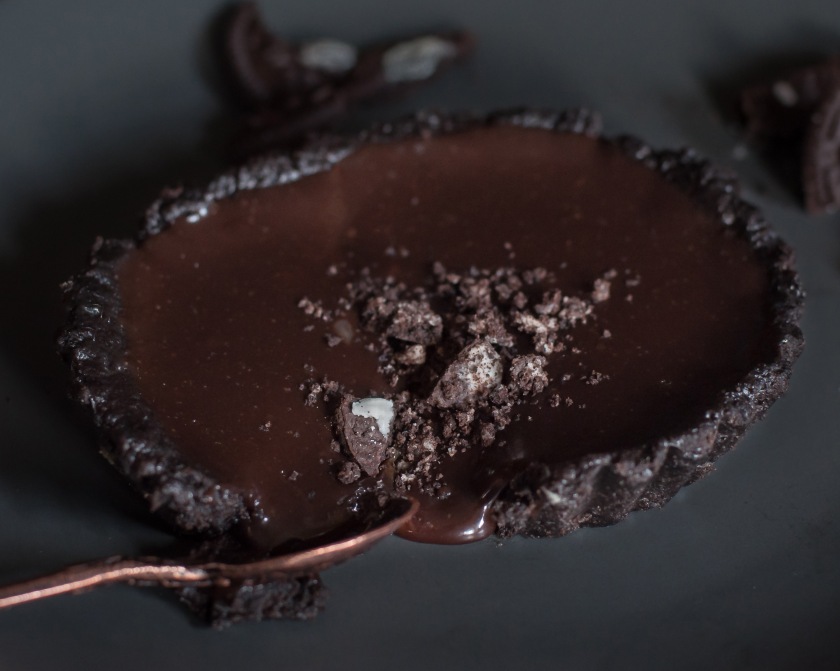
Exams are over (at least for now), so let’s celebrate by eating some chocolate dessert! I couldn’t wait to share this recipe, but these days were so long and filled with studying that I didn’t find the time to edit and post something… But now I’m back at it! If you thought that a chocolate tart is awesome, wait till you try this caramel filled dream with an Oreo crust. I’m drooling even when I think about it.

_DSC0895

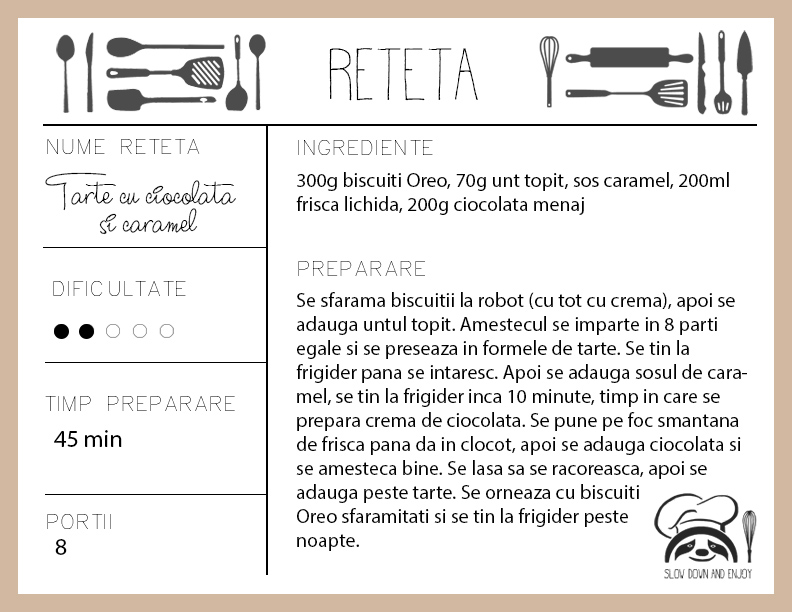
With this recipe I finally nailed the crumbled biscuit base; it didn’t fall apart when I took it off the tartlets tins and it stuck together like it was glued. So, I guess that’s a win for me. The secret is to grind the biscuits really well (keeping the cream also) and to mix in the melted butter while it’s still warm and liquid. Then you will be able to shape the tart crust easily, using a spoon and your own hands. The next step is to cool down in the fridge, but I kept mine in the freezer, so the whole process would take less time.

_DSC0916

Next step is the caramel sauce; I bought mine from Dr. Oetker, only because I was to lazy to make my own- after all, the blog is called “the lazy bakes”, right? (pls don’t hate me). Pour the filling in, 1/2 of the tart crust, and let it cool again.

The last step is to prepare a chocolate ganache; I cannot tell you what a difference makes the kind of chocolate you use to prepare this cream! Stick with the real baking chocolate, the one that has over 50% cocoa, and you will have perfect results. When I made these, I was cheap and went for the “cocoa bars” that they were selling in the baking section (you know, the ones with 12% cocoa or less) and they made my ganache runny and… I don’t know, it wasn’t right.

_DSC0922

_DSC0946

To finish off this long post, I will just say that YOU. MUST. TRY. THIS. Trust me, you will never go back to your old chocolate desserts after you tried this one.

oreo


tarta

Chocolate and peanut butter tart

Cakes, Pies

xvd

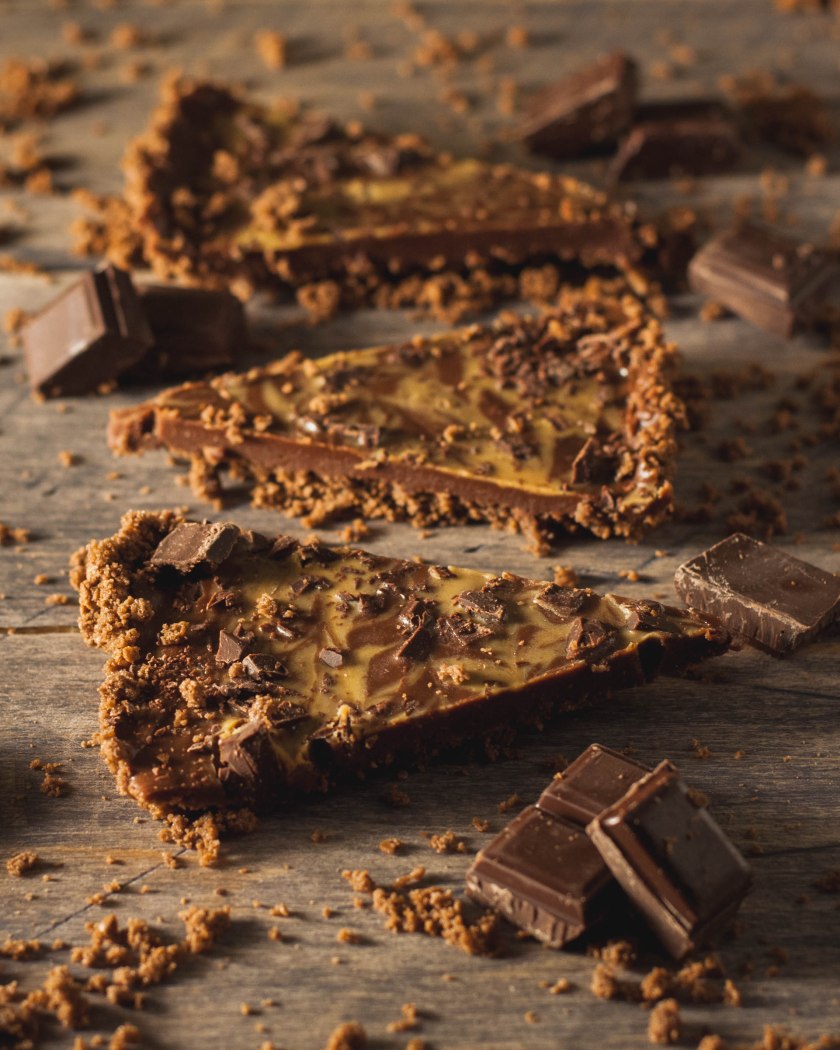
I will just say this from the beginning: I failed at this, I won’t lie. I was so excited because I had’t made something sweet for such a long time and I went all in. The chocolate and peanut butter pie was on my to do list for a long time, but because I was also lazy and  didn’t want to bake a base, I decided to make the biscuit-and-butter one. Aaaand it crumbled away… but still looks good, wright? (Pls say yes)

_DSC1041

I want this to be a way to give tips and share my experience, either good or bad, and be real. So I will lay it out to you: with this recipe you should definitely bake a base or moisten the biscuits first, in order to obtain something… more appealing and eatable.

I served this tart just like this, crumbly, and it still tastes good. Really good. The only problem is the texture of the base. I almost thought about melting it again and make another base for it, but… I had work to do for college, so it was a no-go. Guess I will just stick with the “I shall revenge!” thing.

_DSC1049

If you want to try it out (but God help you if you make the same mistake as I did) check the recipe below:

penut

unufd

pinterest-flatinstagram-icon-957

Bounty muffins

Muffins

There is nothing I love more than the smell of freshly baked chocolate muffins. While I’m washing the remaining dishes from my latest cooking adventure, I’m thinking to myself “how long until I can stuff my face with these??” If you know me you’ll be sure that it won’t take too much time for me to “just try out” what I have just made.

_DSC0964

Let me get to the beginning; I wanted to bake some muffins for a long time, but I wouldn’t want to settle for the basic vanilla ones- so let the research start. I had these coconut flakes in my kitchen for ever and I haven’t used them, and that sparked an idea in my mind; why not make something with them? Coconut frosting, no… coconut muffins, no…coconut AND chocolate muffins, yes. Yes, please.

_DSC1025

Bake the muffins (mine came out perfectly, I was so happy I didn’t burn them), make the frosting -which, by the way, is the easiest ever, and mix the cream. Now you will only have to cut holes in the muffins and fill them with the sweet coconut pleasure. I experienced some trouble while frosting; I may or may not had to place a little muffin cap (dough? batter?) on top of the cream, because some of it mixed with the chocolate frosting. But heeey, that’s ok, it still tastes pretty good.

The best part of this Bounty muffin is the surprise you have while taking a bite out of it. You can’t tell from the outside that you are about to taste the sweet coconut heaven that is inside, and that is freaking awesome. Now I am hungry for muffins.

bounty muffins

Romana:

Nu exista ceva ce sa iubesc mai mult decat mirosul de briose cu ciocolata proaspat scoase din cuptor. In timp ce spal vasele ramase dupa ultima mea aventura in bucatarie, ma gandesc- cat trebuie sa mai astept pana sa ma pot umple de briose?? Daca ma cunosti vei fi sigur ca nu va dura mult pana “doar voi incerca una”.

Ar trebui sa incep cu intentia mea vesnica de a face niste briose, dar nu obisnuitele cu vanilie si fulgi de ciocolata. Intr-un final m-am convins sa incep cautarile pe Pinterest, pentru ca este Biblia mea. Stiam ca am si niste fulgi de cocos de la inceputurile lumii (sau doar de asta-vara) si asa mi-a incoltit o idee- crema de cocos, nu… briose cu cocos, nu… briose cu ciocolata si cocos, da. Da, te rog.

Coace briosele (eu nu le-am ars de data asta- haha!), prepara frostingul si crema. Mai trebuie doar taiate dopuri si umplute golurile cu minunatul rai de cocos. Am ezitat putin daca sa pun sau nu capacele de aluat peste crema- nu le-am pus. Crema s-a amestecat putin cu frostingul. E ok, briosele tot au gust bun.

Cea mai buna parte la briosele Bounty este factorul surpriza: nu stii ce gasesti inauntru atunci cand iei prima muscatura, si asta mi se pare mi-nu-nat. Acum imi este pofta de briose.

briose

instagram-icon-957pinterest-flat

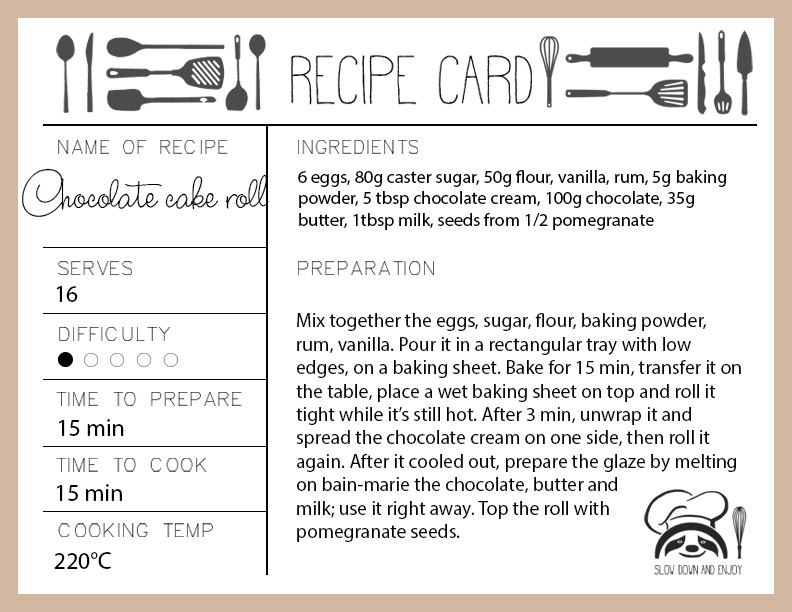
Chocolate cake roll

Cakes, Sweet rolls

The past few days I felt the need of something sweet more than anything in the world. Something with and covered in chocolate, but I couldn’t quite figure out what to bake to satisfy my need aaand … you guessed it, to be fast and easy. So I called my mother and she told me about this cake roll that she made, and I thought -why not? I would make it my own way, with lots of chocolate and pomegranate seeds.

_DSC0720

This is so easy to make it’s actually embarrassing to fail. Except for one part: The rolling. If you don’t roll it tight enough, you will see a hole inside right in the middle, but you can solve that by adding more filling to the cake. Or leave it like that, who cares; your friends will be excited just to have something to munch on.

I absolutely love how the sweetness of the chocolate is tempered by the sourness of the pomegranate seeds; I think it’s the perfect combination. Expect more of this combo in my next recipes, as I am really excited for the pomegranate season to start. And for the cold-weather-type-of-desserts season.

_DSC0712

_DSC0759

In other words, I encourage every lazy person with a sweet-tooth to try out this easy cake roll that brings together chocolate, pomegranate and happiness.

roll

Romana:

In ultimele zile am simtit o nevoie acuta de ceva dulce, ceva cu ciocolata cat cuprinde, insa nu imi gaseam inspiratia de a incropi o reteta si nici timpul necesar de a sta si gati ceva fabulos. Aveam nevoie de ceva rapid, usor si extrem de dulce. Asa ca mi-am sunat mama in speranta ca ma va scoate din impas, si ghiceste ce; asta s-a intamplat. La finalul conversatiei stiam deja ca voi face o rulada cu ciocolata si rodie.

Acest desert e atat de usor de facut, ca as fi fost rusinata sa ratez. O singura parte poate ridica probleme, rulatul. Daca nu o rulezi destul de strans, poate ramane cu o gaura fix in mijloc; si acolo unde ar fi trebuit sa fie umplutura, e un mare gol… se poate rezolva adaugand mai multa crema. Sau o poti lasa asa, prietenilor oricum nu le va pasa decat de faptul ca au ceva dulce sa manance.

Ador felul in care ciocolata este temperata de gustul acrisor al rodiei; posibil a fi combinatia perfecta. Vor urma mai multe retete cu acest combo numai pentru ca sunt atat de incantata de inceperea sezonului de rodii. Si a sezonului de deserturi-potrivite-pentru-vreme-rece.

In alte cuvinte, incurajez fiecare persoana lenesa si amatoare de dulciuri sa incerce aceasta rulada care aduce impreuna ciocolata, rodia si fericirea.

ruytkh

pinterest-flatinstagram-icon-957