Caramel and pear cake

Cakes

Hello, fall! I don’t know if I’m excited about this or not, because suddenly I can feel the responsibilities coming back in my poor student life, but I will try to embrace the fabulous beginning of a fabulous new season. Too much? OK, I’ll take it down a notch. In my desperate efforts to accept that summer is over, I was willing to sacrifice myself to a cake that has been present in my mind since… well, since I’ve discovered it on Instagram (because that’s my principal source of inspiration along with Pinterest- God bless them both). This amazing company in Moscow called @tortikannuchka  makes the most stunning cakes I’ve ever seen in my life, but one of them got my attention in an unhealthy way: a wonderful cake covered in dried and colored pear slices. I was madly in love with it, so I decided to try and recreate it in my own peasant, non-extremely-talented-chef way. Fast forward to the first days of September – I was blessed with a bag of pears that would represent the first step in the making of a pear cake.

I have to admit that I thought so intense about the exterior of this cake that I had no idea what it was going to be inside it until the big day. I knew that I wanted chocolate, but what tastes would go in harmony together? Not to mention that it had to be in sync with the pear exterior, cause what’s the use of covering your cake in pears if inside it’s going to be, for example, a strawberry cream. So, to recap: chocolate layers, a pear cream (had no idea how to do it) and… caramel, of course. But I never did anything with caramel before (the bought caramel sauce doesn’t count)! There were many unknown factors in this baking operation.

PS: I am proud to say that the black cardboard that served as a background will be retired; I finally managed to paint two wood boards! In my excitement I tried to play a little with the light and some pears. AND with one of the backgrounds.

First things first, I cut some pear slices with a professional slicer machine; it works just as well if you cut them carefully by hand in thin slices. Then I bathe them in sugar syrup colored with blackberries, blueberries and strawberries, and another round with food dye. I have to say that the natural dye from the forest fruits worked waaay better than the bottled one, so if you can, choose the first option of coloring. Place the slices in the oven and wait for them to dry, about an hour, then store them in the pantry, not in the fridge.

I baked the chocolate cake, it was cool. Then I got to the cream filling part. How does one melt sugar and transforms it into caramel syrup?? Luckily my mom was there to the rescue and she showed me how to get that amber colored sweet caramel. OK, I figured that part out. But how about the pears? There was no pear cream online so I can get some inspiration, but I already started to chop them in small dices. And poach them. In my mind it would turn into a thick cream like composition, but it wasn’t; it looked like a runny jam stuff. So I added some gelatin, but not enough to make it a stiff gelatin sheet, just the right amount to thicken it a little bit. Yay! I was finally on the assembly part of the cake.

01

One cake, syrup, caramel cream, one cake, syrup, caramel cream on the sides so the pears won’t drip out, pears on the inside, one cake, syrup, caramel cream, more caramel cream. I measured the diameter of the cake and start arranging the pear slices on the counter top in a pattern so I won’t freak out if I have a weird combination of colors left. Then I simply started to add them to the cake, slice by slice, until it was all covered (or that’s what I hoped I did). My cake was finished!!! I still don’t know how the master bakers keep their pear slices from curling, but I won’t give up and still try to ace this technique!

caramel cake

tort caramel

Triple chocolate mousse cake

Cakes

_DSC0460

After a long pause from staying in the kitchen and pretending to be a master chef, I built some courage and got back in. I was feeling like doing something major, something that wasn’t a muffin or a cookie. So I went from nada to a big cake in just seconds of browsing.

22546816_1859969467377120_110273010_o

I got the idea for this cake from a local blogger, jamilacuisine, who made it look very appealing. I have to admit that this was a pretty expensive bake for my poor student wallet, but I couldn’t help but buying all that fancy chocolate and cream. I just hoped that this time I won’t screw up the recipe and need to buy more things (lol sadness).

makeof

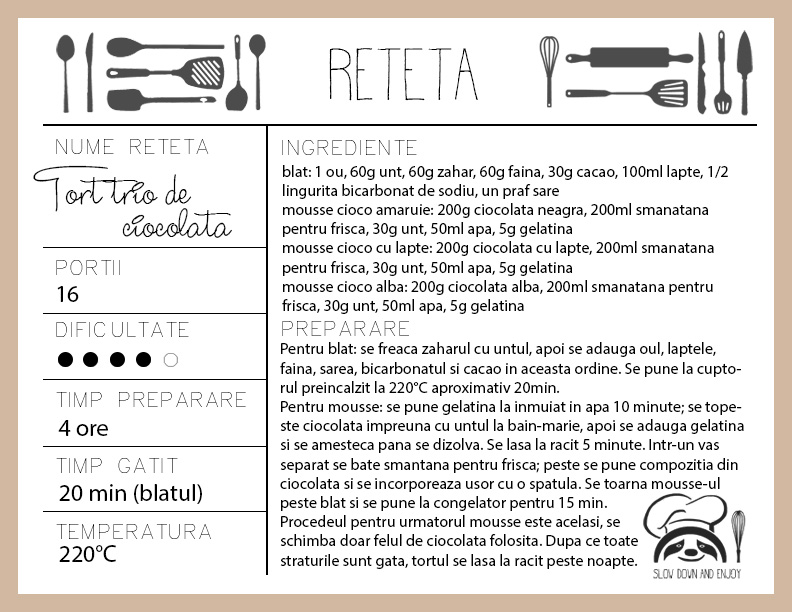
So, the first layer is the baked one. I am not so sure I enjoy the recipe I tried out, but I will post it anyway and let you know when I find a better one; the reason why is because it grew weird and bumpy in places. My secret ingredient is some rum for the flavor, because I didn’t want it to be too blend.

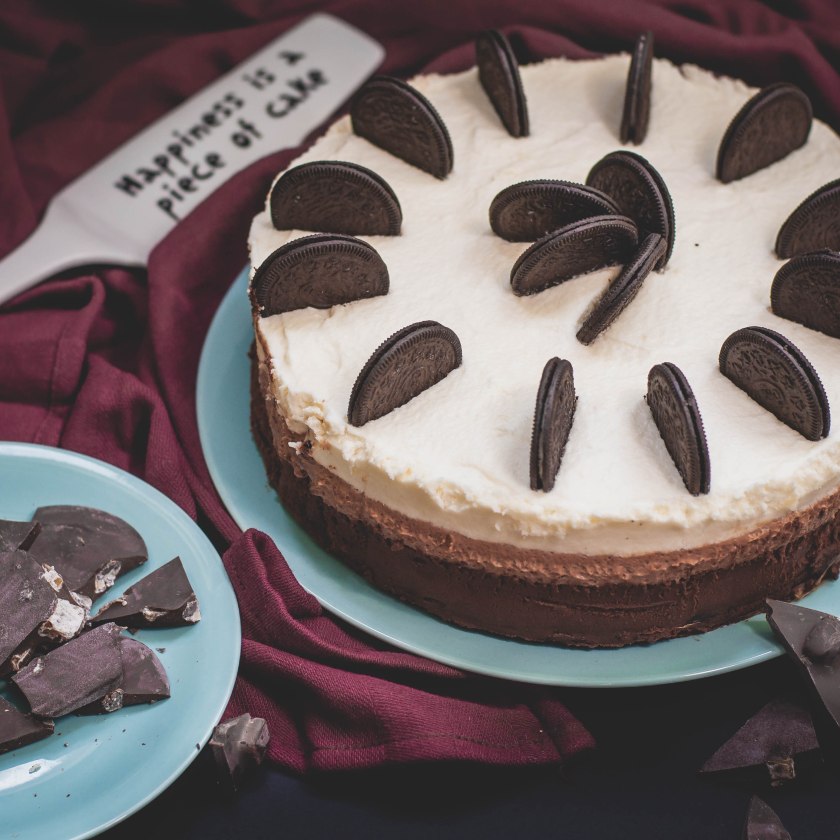
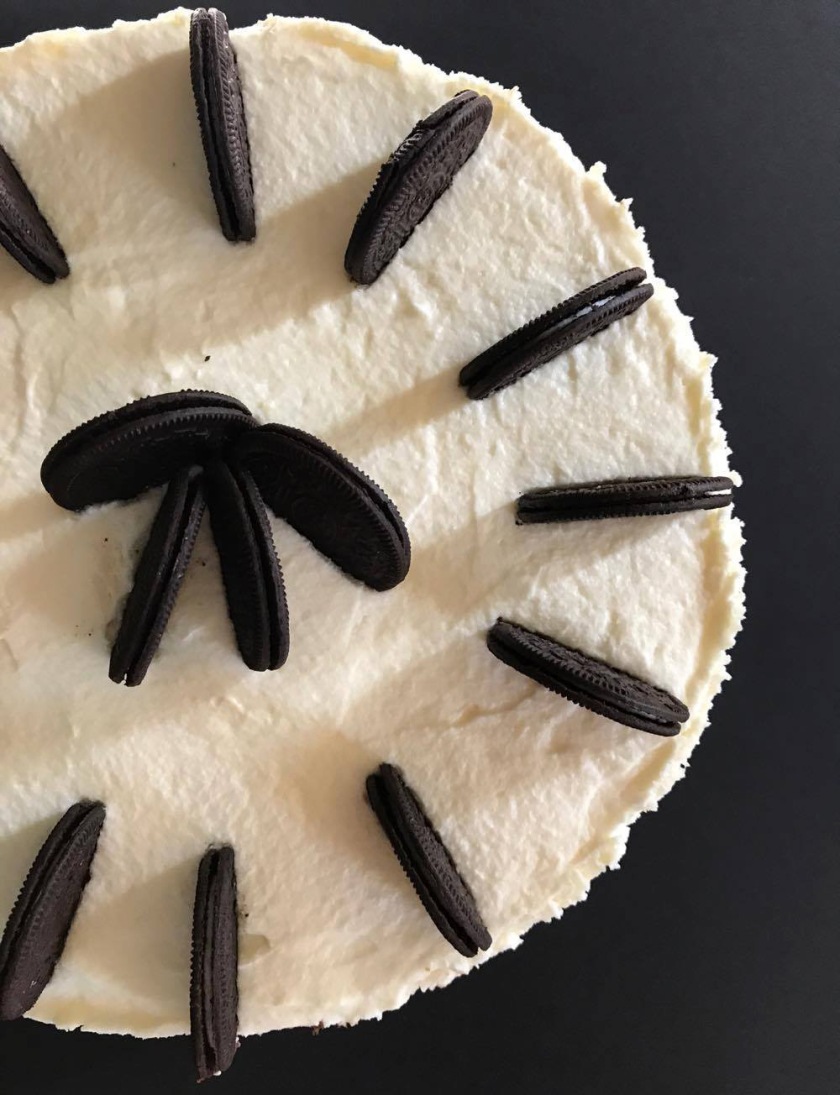
The mousse layers are all the same, just the type of chocolate is different. Don’t forget to moist the gelatin before you start melting the chocolate, cause it needs to be added when the mixture is still hot. The time consuming part is the cooling things one; make sure the whipped cream is cold and the chocolate mix is room temperature before folding them together. Other than that, everything is pretty explanatory. (Oh, and just add some oreo on top!)


I served this cake to some friends to be sure I’m not the only one that thinks is amazing. The taste of three chocolate layers and the moussy texture led them to ask for another slice; yey! It was a success!

Recipe card

Romana:
Dupa o lunga pauza de la statul in bucatarie si prefacutul ca sunt un masterchef, mi-am facut curaj si m-am aventurat din nou. Simteam ca trebuie sa fac ceva maret, ceva ce nu era o briosa sau un fursec, asa ca am trecut rapid de la nada la un tort imens.

Pentru aceasta reteta m-am inspirat de la bloggerul jamilacuisine, care a facut-o sa para foarte apetisanta. Trebuie sa admit ca a fost destul de scumpa pentru buzunarul meu de student, dar pur si simplu nu m-am putut abtine sa nu cumpar cea mai buna ciocolata Nestle si Milka, caci stiu ca aceasta se va topi si omogeniza placut in prajitura. Am sperat doar sa nu gresesc ceva si sa fie nevoie sa ma reintorc la supermarket dupa mai multe lucruri.

Primul strat este blatul. Nu sunt sigura ca mi-a placut reteta pe care am incercat-o, dar tot o voi posta si va voi anunta cand gasesc una mai buna; motivul este cresterea inegala a acestuia in cuptor. Pentru aroma am adaugat rom – un capac- in apararea mea, nu aveam esenta in dulap.

Straturile de mousse sunt la fel, exceptie facand tipul de ciocolata folosita. Nu uita sa inmoi gelatina inainte de a topi ciocolata, caci trebuie sa fie calda cand este incorporata. Important este ca si frisca sa fie rece cand este batuta, iar amestecul de ciocolata sa ajunga la temperatura camerei pentru a nu se taia compozitia. Inafara de asta, mai pot da doar un sfat: pune oreo deasupra!

Am servit din tort unor prieteni pentru a ma asigura ca nu sunt egocentrica cand spun cat de minunat este. Gustul a trei ciocolate si textura usoara de spuma a condus la dublarea portiilor; yey!! A fost un succes!

Recipe card RO

pinterest-flatinstagram-icon-957

Zebra cake

Cakes, Loaf cakes

I started out believing that this is a simple recipe that will take no more than half an hour, but boy I was wrong. Somehow I managed to screw up even the easiest thing to bake on my first attempt. But after I was a bit disappointed by the outcome of my Zebra cake, I made the best out of it: I baked another one, prepared some chocolate frosting (I will post my recipe of it here) and voila! c’est un gâteau.

iahoo

This is pretty easy to bake, if you don’t make the rookie mistakes I did (and I’m ashamed of). Mix the ingredients, then add cocoa in half of the composition. Be sure to blend it really well, otherwise it will remain lumpy after cooking (mistake n°1).

1-2

Add one spoon of white batter, then one spoon of black batter, back again with the white batter… until it will look like a zebra in a washing machine. Be sure to place them in the center of the pan or else the last spoon of the mix won’t be right in the middle where you want it to be (mistake n°2).

etape

Do not, I repeat, DO NOT hit the tray on the counter top hoping that the batter will arrange properly (mistake n°3). That is just nuts. Just go on in life with the choices you made (to have a decentered cake). felie yum

After you ignored all my tips and you got a flat Zebra cake, go bake another one the right way. Then make some chocolate frosting and unite everything in a big lovely cake that goes amazing with a cup of coffee!


zebra

Românã:

Am crezut initial ca aceasta e o reteta simpla ce nu imi va lua mai mult de jumatate de ora, dar uhu! cat am putut sa ma insel. Cumva am reusit sa esuez din prima incercare; probabil eu pot invata doar din greseli. Dar dupa ce am lasat dezamagirea la o parte, am decis sa profit de situatie: am mai pus in cuptor un blat de prajitura zebra, am preparat crema de ciocolata (link aici) si voila! c’est un gâteau.

Tortul este destul de usor de pregatit daca nu faci aceleasi greseli de incepator ca mine (de care sunt destul de rusinata). Combina ingredientele, adauga cacao in jumatate de compozitie; ai grija ca aceasta sa fie amestecata foarte bine, altfel se formeaza cocoloase care raman si dupa coacere (greseala n°1).

Pune in tava o lingura de aluat alb, apoi o lingura de aluat negru, apoi alta de aluat alb… pana va arata ca o zebra in masina de spalat. Asigura-te ca le plasezi fix in centrul tavii, altfel ultima lingura de aluat nu va fi in mijloc unde ar trebui (greseala n°2).

NU bate tava de blat crezand ca lucrurile se vor aranja cum trebuie (greseala n°3). Asta e o nebunie. Continua-ti viata acceptand alegerea pe care ai facut-o (aceea de a avea o prajitura descentrata).

Dupa ce mi-ai ignorat toate sfaturile si ai ramas cu o zebra necrescuta, du-te in bucatarie si mai fa una cum trebuie. Apoi prepara crema de ciocolata si uneste totul intr-un tort mare si adorabil ce merge servit perfect cu o cana de cafea!

Recipe card RO

pinterest-flat instagram-icon-957