Christmas spices panna cotta

Cheesecakes

This has to be one of my favorite Christmas Countdown desserts that I’ve made. I had these lovely snowflake molds and not a single idea what I could do with them; in my mind, it had to be something white (because it’s a snowflake!!), so something with chocolate was inappropriate (who likes muddy snow?!), something with lemon was out of the discussion as well (just two words… yellow snow). What was I supposed to do to check my list? I had the idea of a panna cotta made with some lavender honey that I got from a Christmas fair, but it was way to boring for me to just add some honey (it tastes good, but that wasn’t what I was searching for). I browsed a little for inspiration on the internet until I found a recipe made by Kylie Millar, MasterChef Australia Series 4 contestant, and I was hooked. He made a panna cotta with cinnamon, cloves and anise and ^Oh my, should I add all these spices that you usually use for gingerbread in my Christmas panna cotta?^ YES. It’s the best of both worlds, the softness of the panna cotta combined with the taste of gingerbread. Maybe I should have called this gingerbread panna cotta, but now it’s too late for that šŸ™‚ Anyway, too much gibberish; try the recipe and you’ll be pleasantly surprised! Merry Christmas!

Madeleine

Cookies

Meet Madeleine, the cutest mini-cake ever inventedĀ in France in the middle of the 18th century; soft like a sponge and with a hint of orange, this is the best excuse to have something sweet with your tea or coffee. I was so excited when I found a tray at the store that had madeleine forms (and other ones, like hearts and teddy bears- but that’s another story); the only downside it was that I had so much work, I couldn’t play with it for at least 2 weeks… BUT now, having no realĀ responsibilities (that I care of), I started a bake off challenge! I only hope the fridge and my stomach could keep up with my pace.Ā 

The funny thing with madeleines is that you have to add the butter in the last moment; usually you would cream the sugar and butter together, but in this recipe you should mix everything before, and than add the melted fat. In order to make the dough hard-ish again, place it in the fridge for an hour before scooping it into the shapes and baking it.Ā 

Ever since I met the chocolate ganache glaze I absolutely loved adding it to everything; it is so easy to make, and it’s guaranteed to work (and you will easily remember the heavy cream-chocolate ratio). When I was younger I used to make the Dr Oetker kind of glaze, the one that you would add some water to a chocolate-like powder and it would become a paste! So freakishly easy, but not as tasty as the real deal, sadly… Anyway, if you decide to cover your madeleines in glaze than you should definitely make another little step, and that’s adding crushed peanuts on top – a total game changer! PS: little trick that I learned- dip the cookie into the glaze, then dip it in a bowl filled with crushed peanuts. That way, when you let them vent on a cooling rack, you won’t destroy the chocolate layer (and it won’t pour on the rack). Double win!

So many words for such small dessert; you got to try it to see what a little wonder this madeleine is!

Chocolate dome

Cakes

chocolate dome01297

I reached that point in my life where I am OK with spending my money on kitchen supplies rather than on clothes or shoes, which is weird, because everyone who knows me knows that I am (or was…) a complete shopaholic. But ever since I laid my eyes on this dome mold a year ago I wanted it to be a part of my collection of… 3 trays and 2 cooking rings (I’m working on it, ok?!). So one day I entered The Kitchen Shop, went straight to the trays section and held it close to me while I was browsing for other stuff. By the end of the shopping spree I found myself going to the cashier and paying some hard earned money for this 6 dome silicone mold. What can I say, I got hooked up on the idea of making all kinds of chocolate or fruits entremets covered in mirror glaze, with biscuit or brownie base, decorated with caramel, ganache or fruits; the options were unlimited!

chocolate domes

After a few tries I finally got right the chocolate dome; the first time I waited too long for the chocolate mirror glaze to cool and it was hard to spread around; taste wise, it was a sweet dream covered in chocolate and with an Oreo heart. The second time I used less whipped cream and I certainly incorporate better the chocolate ganache in it because it turned into a rich brown mousse. Also, I wasn’t left with a ton of cream to spare (it actually is the right amount yay). I didn’t use the Oreo heart anymore because the last time my dad scattered it all over the kitchen; guess it was to hard compared to the soft mousse.

I made these a couple of times and I have to admit, every time I do it better than the last. That is encouraging, because I hope that people are not bored yet by my countless trials and they still enjoy the dessert. The soft mousse is a perfect match to the brownie base, while the chocolate glaze covers everything in a silky smooth layer; to add some contrast to all this sweetness, I paired the dome with a crushed peanuts belt. At some point, I swapped this for a crushed pistachio base, and it was great too.

chocolate dome01298

This is one of the desserts I will never stop making, for 3 reasons:

  1. unlimited choices of ingredients
  2. tastes heavenly
  3. looks like a high-end dessert made by a french pastry chef

Bonus reason: I absolutely love sweet stuff. And I have a feeling that everyone who reads this has, so … make. the. dome.

chocolate dome

dom de cioco

Cinnamon rolls

Sweet rolls

The fall colors, the sun setting down early, the lovely sound of crashed leaves- I would say the cold weather too, but it isn’t the case- are making me go into a nesting mood. Knowing that Christmas is 25 days away, I almost want to skip all this nonsense warm weather and wear my best sweaters, drink hot beverages and complain about how cold is outside while wanting to be outside in the snow. One of the things that reminds me of holiday season is the smell of cinnamon in the air- I don’t know if it’s because of the babka, the cookies or the gingerbread, but it most certainly takes me into a Christmasy mood.

I haven’t tried to make a babka myself, so I stick to what I know and love (that contains cinnamon, of course) – cinnamon rolls. Cinnamon buns. Cinnabon. Whatever you call them. Buns of happiness. Ok, I took it too far. I think this is the third batch in the last two weeks- what can I say, I’m hooked to them! I made the first with apple bites in them, and they were tasty af! Aesthetically pleasing, not so much, cause they spread like crazy.

Then I made them again with apples and still, a major fail on the looks department. I think I ate like 20 cinnamon rolls in a week just to get that perfect shape and recipe. Finally, I ran out of apples and made them with only cinnamon and sugar – AND surprise! They grew like crazy, making me a proud owner of a successful tray of cinnamon buns. Soft, melt-in-your-mouth, buttery rolls. I can’t even begin to explain how happy I was! 

Also, if you’re interested, you can check my cinnamon recipe from last year (and my photo skills at that time- horror.) The recipe is the same, the baker is the same, only the photos are different. GOOD different haha. Click here and you will see for yourself!

Chocolate and caramel tarts

Pies

I can’t really wrap my mind around the fact that college started… again. With all the changes happening in my life -like waking up early in the morning, making my own food and staying way to much at school- I really wanted to lift my spirit up; and what better way to do that than baking something with lots of chocolate in it? These tarts are the perfect excuse to indulge something sweet and savory at the same time, without compromising your happiness.

01

For the first time ever I betrayed my tart crust recipe and I went for the store bought one. Although it saved me some time, I am not that impressed by it; it tastes ok, I can’t complain, but for tartlets it’s not that efficient. You can’t reuse the leftovers that remain after cutting your small shapes, and I learned that the hard way. After rolling the dough again, it puffs up in the oven like crazy (time to switch to pizza bites haha). I still managed to ace 9 little cute tartlets shells tho!

04

The secret key to these lovely tarts is the layering factor. First you have the pie crust, which brings it all together, then you have the caramel sauce, the crunchy peanuts layer, the chocolate ganache and the caramel drizzle. And again some decorative peanuts. Boy that was a lot. Disclaimer: I don’t really care about calories (although I should), so I don’t mind the… boost in my daily intake, but if you are all about that stuff, you probably… should bake the tarts and change your mind. Tee-hee.

05

On another note… I really hope that I’m improving the food photography and editing technique, especially since I watched bromabakery’s tips for succeeding in this domain. In my opinion, the hardest thing to do is to find yourself and to find that something that makes you unique and different from all the other accounts that have the same theme. I am still working on that aspect… and most likely I will struggle with it for another period of time; but trying your best is what you should do, right?

07

The motto for today: sweet and savory, all in a shell- what else do you need?

Chocolate cupcakes

Muffins

I really really really wanted to bake something with chocolate. Chocolate batter, chocolate chips, chocolate frosting, chocolate on top of chocolate! I might have a little addiction to this ingredient… When it comes to chocolate, more is more and less is a bore, so let’s apply that in the kitchen and start baking some choco-licious cupcakes!

0101.jpg

Funny story about these little ones: I blind baked them!! I know, it sounds like one of those click-bait titles on Youtube, but it’s more accurate than you’d think. It was a huge storm outside the night I was making cupcakes, and soon after placing them in the oven, the lights went off. And the oven timer. Aaand the oven light. I didn’t even know how much time has passed already! I quickly turned on the timer on my phone, estimatingĀ  a baking time, hoping not to burn everything (including the house). Everything was baked then with the help of my brother who held his phone flashlight while I was checking on the cupcakes, making another batch and washing dishes. Needless to say, the lights went on when I finished with everything… and the cupcakes were out, cooling on a rack! I guess I got lucky, cause they turned out just fine, so I need to stop complaining.

03

The first one I ate was “a failed one”, how I like to call it. I was just struggling a little bit more with it while trying to get it out of the pan and it came out with a missing piece. That’s a good enough reason to eat it right away, even though it was still hot and it burned my mouth. What can I say, I am a greedy person when it comes to sweets. Not to mention that I love to eat the leftover batter on the spatulas every time…

05

cupcakes

briose

Caramel and pear cake

Cakes

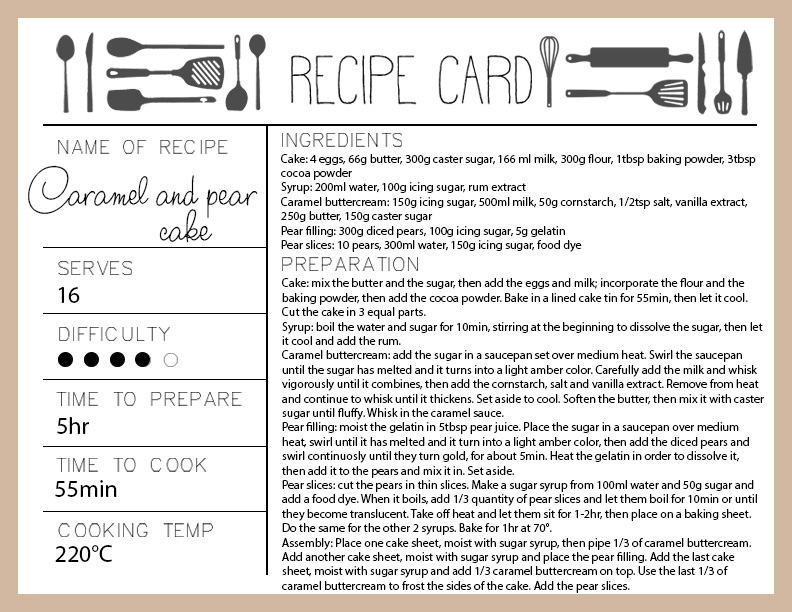
Hello, fall! I don’t know if I’m excited about this or not, becauseĀ suddenly I can feel the responsibilities coming back in my poor student life, but I will try to embrace the fabulous beginning of a fabulous new season. Too much? OK, I’ll take it down a notch. In my desperate efforts to accept that summer is over, I was willing to sacrifice myself to a cake that has been present in my mind since… well, since I’ve discovered it on Instagram (because that’s my principal source of inspiration along with Pinterest- God bless them both). This amazing company in Moscow calledĀ @tortikannuchkaĀ Ā makes the most stunning cakes I’ve ever seen in my life, but one of them got my attention in an unhealthy way: a wonderful cake covered in dried and colored pear slices. I was madly in love with it, so I decided to try and recreate it in my own peasant, non-extremely-talented-chef way. Fast forward to the first days of September – I was blessed with a bag of pears that would represent the first step in the making of a pear cake.

I have to admit that I thought so intense about the exterior of this cake that I had no idea what it was going to be inside it until the big day. I knew that I wanted chocolate, but what tastes would go in harmony together? Not to mention that it had to be in sync with the pear exterior, cause what’s the use of covering your cake in pears if inside it’s going to be, for example, a strawberry cream. So, to recap: chocolate layers, a pear cream (had no idea how to do it) and… caramel, of course. But I never did anything with caramel before (the bought caramel sauce doesn’t count)! There were many unknown factors in this baking operation.

PS: I am proud to say that the black cardboard that served as a background will be retired; I finally managed to paint two wood boards! In my excitement I tried to play a little with the light and some pears. AND with one of the backgrounds.

First things first, I cut some pear slices with a professional slicer machine; it works just as well if you cut them carefully by hand in thin slices. Then I bathe them in sugar syrup colored with blackberries, blueberries and strawberries, and another round with food dye. I have to say that the natural dye from the forest fruits worked waaay better than the bottled one, so if you can, choose the first option of coloring. Place the slices in the oven and wait for them to dry, about an hour, then store them in the pantry, not in the fridge.

I baked the chocolate cake, it was cool. Then I got to the cream filling part. How does one melt sugar and transforms it into caramel syrup?? Luckily my mom was there to the rescue and she showed me how to get that amber colored sweet caramel. OK, I figured that part out. But how about the pears? There was no pear cream online so I can get some inspiration, but I already started to chop them in small dices. And poach them. In my mind it would turn into a thick cream like composition, but it wasn’t; it looked like a runny jam stuff. So I added some gelatin, but not enough to make it a stiff gelatin sheet, just the right amount to thicken it a little bit. Yay! I was finally on the assembly part of the cake.

01

One cake, syrup, caramel cream, one cake, syrup, caramel cream on the sides so the pears won’t drip out, pears on the inside, one cake, syrup, caramel cream, more caramel cream. I measured the diameter of the cake and start arranging the pear slices on the counter top in a pattern so I won’t freak out if I have a weird combination of colors left. Then I simply started to add them to the cake, slice by slice, until it was all covered (or that’s what I hoped I did). My cake was finished!!! I still don’t know how the master bakers keep their pear slices from curling, but I won’t give up and still try to ace this technique!

caramel cake

tort caramel

1 year of TheLazyBakes!

Uncategorized

This morning I woke up with the satisfaction of having (finally!) over 500 followers on the LazyBakes Instagram account. I know that for many people this is a small number, but since I started this journey of documenting the things I bake I wanted to reach out to as many people as I can, to showcase my work, my progress, my failure (got a lot of that) and over all to inspire others to bake the things they may be thinking that are hard. The surprise was doubled by the fact that WordPress notified me on my 1 year anniversary, today. So let’s check the numbers: 1 year, 35 published recipesĀ  (there were so many others that didn’t make the cut, for obvious reasons), a lot of food shots, 2 recipe collabs, 60 Instagram posts, 505 followers… I feel like I’ve accomplished so much, when in reality it’s just a small part of what I want to do.

I am really proud of myself for reaching a 1 yr anniversary with this project (I don’t know how to call it) because low key I thought I was going to abandon it as soon as the college started. But with the help of my talented photographer (yes, I don’t take my shots alone) I managed to make it till today. Sometimes the cake was dropped on the floor, sometimes it was burnt, sometimes I forgot to add gelatin to a panna cotta and wonder why is spilled all over my fridge, sometimes I cried all over a glaze, but that’s just a small bit of what this meant to me. Writing all this recipes, documenting, baking and serving the final product to a crowd that would appreciate it (or criticize it in the nicest ways) was really fulfilling. I hope to continue making this happen and I hope that next year I would read this post and laugh at myself for the stupid things I wrote back when I thought 505 followers is a big number.

I don’t know if anyone reads this (except my mom and dad), but I will post anyway some photos so you can see the progress made in 1 year. Have a laugh!

I was really into that moody looking photos, but I didn’t quite get that the food should look good, full of life and well illuminated. Also, my composition skills were based on spilling stuff all over the board.

In my opinion, this is a big improvement. Not only you can clearly see the food, but the colors are vivid and attractive, and the light is there. IT IS there. And I did it all by self teaching, no expensive classes or anything. As an anniversary gift to myself I made two new board so I won’t have to use that stupid black cardboard in the back again. YAY me! Also, I got “summer is ending” anxiety and I started to rush into doing the things I was supposed to do this past 2 months šŸ™‚

Strawberry fraisier

Cakes

My goal for this summer was to try out new recipes that I was afraid of, so Iā€™m not going to lie, this was a challenge for me- especially since I’ve had bad experiences with folding creams and pouring them into cooking rings. If you donā€™t know by now, this stunning dessert is called Fraisier, a classic French cake that is traditionally composed of a sponge cake cut in half, filled with creme patisserie and topped with almond paste which I swiped for a strawberry gelĆ©e. My expectations have been exceeded ever since I took the first bite out of this amazing dessert; I mean, how can something be so fluffy and delicate and still taste like strawberry heaven?!

011.jpg

Start off by making a sponge cake sheet; I didn’t include a photo of that because I think it’s a pretty easy step. Be careful though not to make it any thicker than 1 cm or half of inch because you’ll use two sponges anyway. Cut that cake sheet in twice as much circles as the number of cakes you’ll want cause one of them goes on the bottom, one on top. Make a sugar syrup to moist the sponges and add a little lemon extract in it for a nice twist. After that, cut the strawberries in 4 slices and arrange the bigger ones along the cooking ring. Set the other ones away.

Half of the job is done! You need to prepare the creme patisserie now; don’t rush into it, because if you don’t wait for it to cool down before you add the butter or mix it in with the whipped cream you’ll get NADA. And by nada I mean a soggyĀ heterogeneous combination of ingredients. You don’t want that. So search deep inside of you for some patience, because after all you wanted to bake this French dessert to prove yourself something. (#peptalk)

02

While the desserts are cooling in the fridge, make a thin layer of strawberry gelee (thinner than mine, if you can) and let it set, then cut it in circles and add it on top. Finish the fraisiers with fresh strawberries and serve it as soon as possible, so you won’t drool all over when you open the fridge occasionally (this is the best tip ever!).

If you love strawberries as much as I do and you are looking for a fancy way to incorporate them into a dessert, I assure you that this is the one and only way to do that. There’s nothing that compares to that feeling of accomplishment when you take off the cooking rings and you see the beauty inside, the almost-perfect arrangement of fresh strawberries contrasting with the whiteness of the cream. I can gush about this a whole week if you let me, but I’ll stop for now; if you want to make this yourself, check the recipe below!

strawberry fraisier


fraisier capsuni

Peach panna cotta tart

Pies

BecauseĀ technically it is still National Peach Month I wanted to share another favorite recipe of mine using this fruit. Combining the softness of the panna cotta with the crunchiness of the base, this might be the perfect way to eat something sweet without worrying about your summer body.

01

The day I made this I was feeling a bit adventurous, exchanging the common cracker base for one that has oats and walnuts in it. The subtle taste of it makes a great pair with the peachy, fine flavor of the cream, and brings more texture to the whole dessert. After I tried really hard to grind the walnuts in a small coffee grinder (because why not) without burning down the whole kitchen, it was time for the oat flakes; no plot twist here, they came out nice. Sadly, I didn’t have enough budget to go on a all-nuts-and-healthy-stuff base, so I also used some simple crackers. I combined them all with melted butter and pressed the composition down in a pan. The hardest part is to press the edges in a way so they won’t break down – here is where it comes in handy to use a glass or something to get around them; also, your own fingers are your best friends. When I will find another way, I will share it ASAP.

03

I like to use panna cotta as the cream for a tart because of it’s fine, slightly sweet taste; from my trials, I discovered that this kind of filling works better with a cracker base rather than a dough one because it soaks right in, making the biscuits stick together even more. Another tip would be to use the ripest peaches you can find in order to get that lovely flavor in the panna cotta, and for the decor to use the slightly harder ones, so they will keep their form and won’t drip down on the top of your dessert.

02

Mistake nĀ°1 to avoid: not using aĀ detachable bottom pan; that will mess with your whole tart. I wanted to take it off the tray in order to get a nice picture and to get it to look more presentable, but the funniest thing happened: as I was flipping it over with a plate on top, half of the base began to fall off; but I wouldn’t stop there. I flipped it again, so it would be in the normal position, with the base down on a plate and the panna cotta on top, but -guess what- the other half began to crumble. Fast forward 100 tears later, I began to recreate the crumbled base in the pan with the help of some melted butter and to add the hardened cream on top. I think I fixed my mess nicely, as no one could say what tearful event happened before.

Peach tart00983

Top the tart with fresh slices of peaches, mint and lavender for aesthetic reasons (I’m not comfortable eating freshly picked lavender yet) and finally, have a slice. After the hard work you’ve put into making this, you deserve to have a taste.

Tart


Tarta